
Elevations
Every junction and tank needs a ground elevation before a run can report a pressure at it. epanet-js fills the value in as you draw. When you place a node on the map, it takes its elevation from a terrain source automatically. In the Elevations section of the Map tab you see which source gave the value. You can also add your own source, and go back over the nodes that have no elevation yet.
For what elevation means to the engine, see the EPANET manual. This page is about where the number comes from.
Auto-elevations
Section titled “Auto-elevations”While Auto-elevations is on, the app fetches an elevation from the enabled sources whenever a node is created or moved:
- You place a junction, reservoir or tank with a drawing tool.
- You draw a pipe, pump or valve that creates a node at either end.
- You drag an existing node to a new position.
Nothing else starts it. A project that you open, an INP that you import and a model that you build from GIS all bring their own elevations. Auto-elevations does not go back over a model that is already loaded. The recalculation actions do that instead.
Auto-elevations is on for every project on a real-world projection. It is off on an X-Y grid project, because there is no ground to look up. There is no switch for it, and the state follows the projection. On a narrow window, the status bar popover shows it as On or Off, next to Auto-lengths. You can also disable the sources instead. Then the app fetches no elevations, and the projection stays as it is.
The Elevations section
Section titled “The Elevations section”The section sits in the Map tab of the side panel, below Customer points and above Layers. It is not there on an X-Y grid project. For the rest of that tab, see The map and its layers.
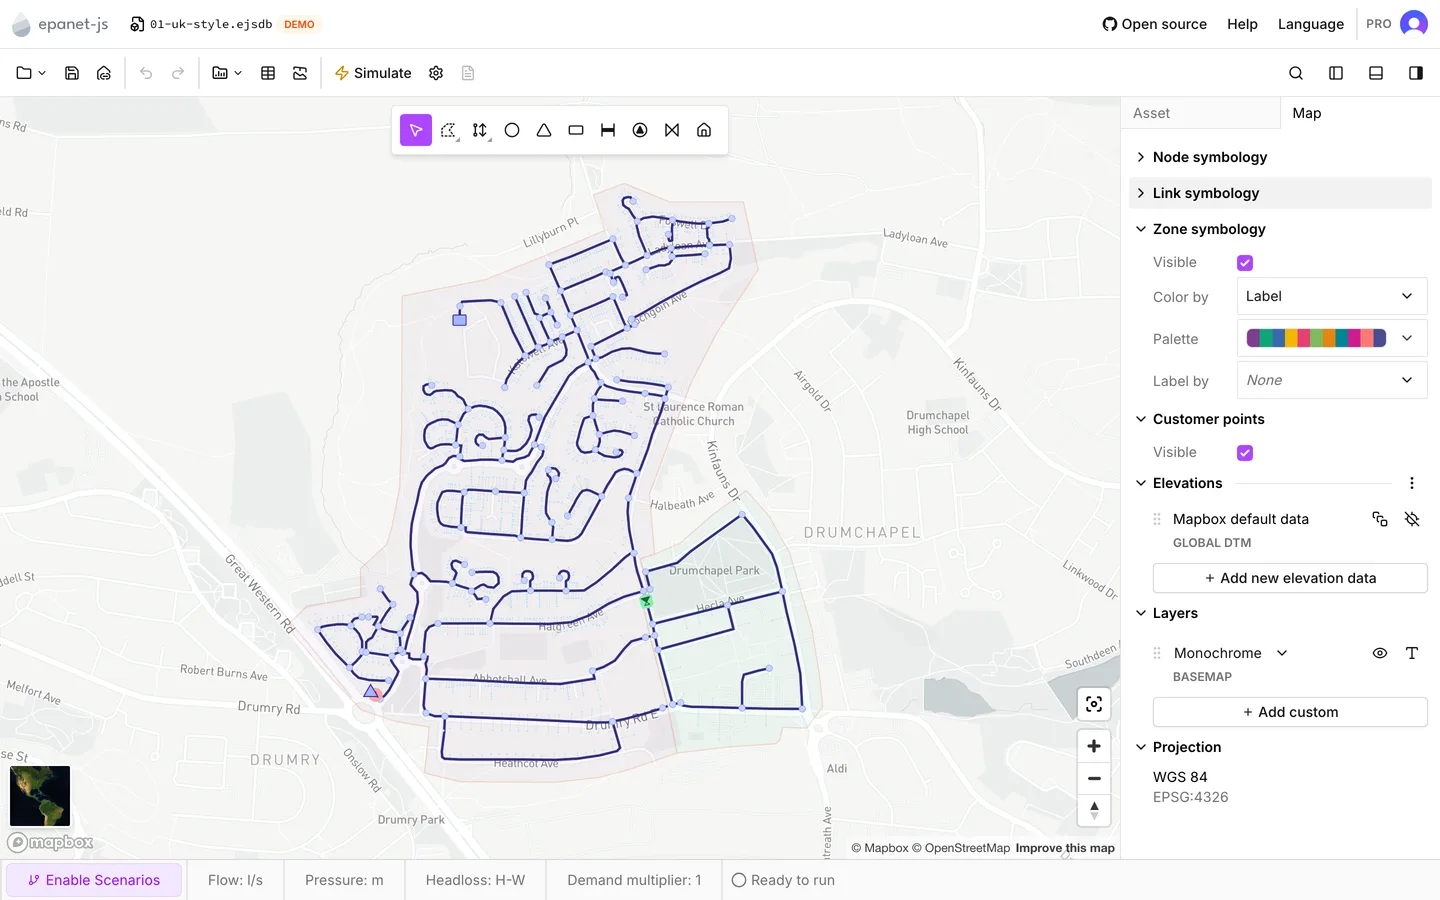
Every project starts with one source, Mapbox default data. The line under the name reads Global DTM, which is global terrain data that arrives as tiles. While you are offline, the row is grayed out and you cannot turn it on or off.
The list shows the source with the highest priority first. The app looks up a point from the top row down. The first source that returns a value for the point wins. The app passes over a source that does not cover the point. To change the order, drag the handle at the left of a row.
| Row | What it carries |
|---|---|
| Mapbox default data | An Elevation source details popover with Elevation offset, and a button that reads Disable elevation source or Enable elevation source |
| User elevation data | The grid resolution and the file count under the name, an Elevation source details popover, and a delete button |
While an extended period run plays back, the whole section is read-only. You cannot reorder or delete the rows, and the app hides the actions button. To change anything, stop the playback.
Elevation offset
Section titled “Elevation offset”The app adds Elevation offset to every value that the source returns, in the project’s elevation unit. The offset applies to the whole source, not to one tile.
When a source sits on a different vertical datum from the rest of the model, use the offset. Take a point whose level you already know. Compare that level with the value from the source. Type the difference.
Your own elevation data
Section titled “Your own elevation data”Add new elevation data at the bottom of the section takes GeoTIFF files
(.tif, .tiff) from your machine. Select as many files as you need to cover
the area. The files become one User elevation data source. The app puts
that source above the Mapbox row, so it is tried first.
After the files load, epanet-js works out the footprint of each tile. It shows Elevation tiles processed when this work ends. You can use the source before that. Only the coverage outline is not ready.
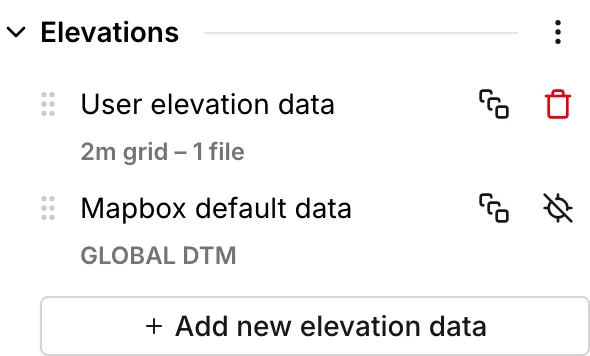
The Elevation source details popover of this source holds:
- Elevation offset, which works here in the same way.
- Elevation unit, meters or feet. This is the unit of the values in the file. You must set it before you rely on the source, because the app does not read the unit from the file. Feet read as meters is a silent error.
- The tile list. When you hover over a row, the map shows the footprint of that tile. When you click a row, the map zooms to that tile. The delete button on the row deletes the tile. Add more tiles adds further files to the same source.
While the popover is open, the map outlines the coverage of every tile. This is the quickest way to make sure that the data you loaded reaches the part of the network you care about.
Files that will not load
Section titled “Files that will not load”When the app cannot read a file, The elevations data could not be loaded appears. The message counts the failures and groups them by reason behind Error details:
- An unsupported coordinate system
- Missing or invalid custom projection parameters
- Geocentric (3D cartesian) coordinates
- A missing or zero pixel resolution
- An invalid transformation matrix
- A file that the app could not read at all
The app still adds the files that it could parse, so a mixed selection is not lost.
Custom sources are a paid feature. On the free plan Add new elevation data opens Upgrade to use your own elevation data instead. See Plans.
Recalculating elevations
Section titled “Recalculating elevations”Elevations actions is the button at the right of the Elevations heading. It holds two commands, and each one shows the number of nodes that it acts on:
- Recalculate missing elevations acts on junctions and tanks that have no elevation. It starts immediately.
- Recalculate all elevations acts on every junction and tank. It asks first, in a dialog that says the app overwrites every existing elevation. Recalculate all confirms it.
Both commands act on junctions and tanks only. They leave the Elevation of a reservoir alone, because what matters at a reservoir is its Head. See Reservoirs.
A progress dialog shows Recalculating elevations… with the file or tile batch in progress, and offers Stop. When you stop, the app keeps every elevation that it resolved up to that point.
| How it ended | What you see |
|---|---|
| Every node resolved | The dialog closes and Elevations updated appears as a notification |
| Some nodes not covered | The dialog stays open with Some nodes are not covered by the elevation data. and a count of Elevations updated against Not updated |
| No node resolved | No elevations updated |
| No source enabled | No elevation source available, which sends you back to the section |
| Stopped | Recalculation stopped |
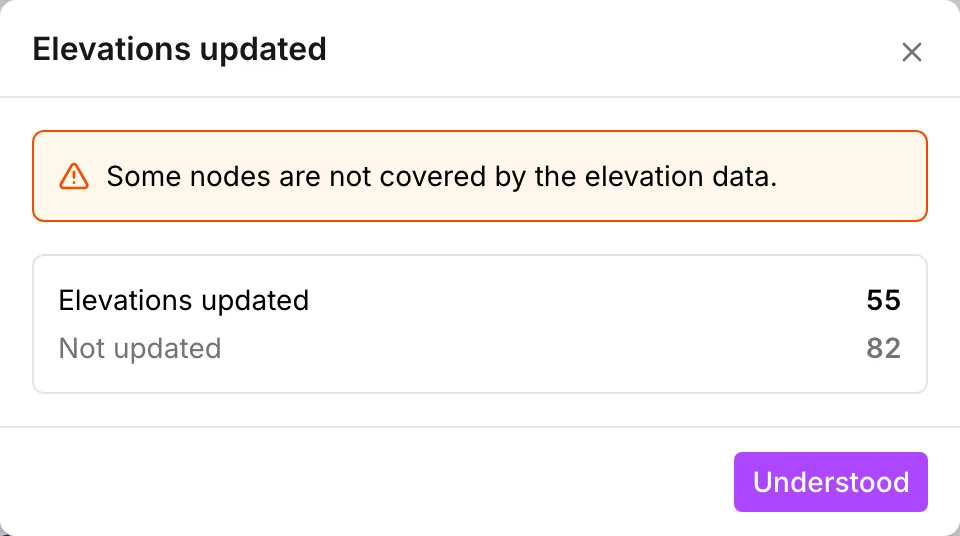
A recalculation is one entry in the undo history. If the result is not what you wanted, Ctrl+Z puts every elevation back at once.
A recalculation is also a paid feature. On the free plan both entries carry a lock and open the upgrade dialog instead.
When an elevation cannot be fetched
Section titled “When an elevation cannot be fetched”If the source does not answer, you get a notification and the node keeps no elevation. For a point outside the data, the notification is Elevation not available. When the app is offline, it is Failed to fetch elevation.
A run does not accept this state. Network Review reports it under Model attributes as Elevation missing, which is an error, and the pre-run check stops on it. There are two ways to correct it. Type a value into Elevation in the asset tab. Or, once the source is back, use Recalculate missing elevations.
What is saved and what is not
Section titled “What is saved and what is not”Elevations are model attributes like any other. The app saves them in the project file, exports them to an INP, and carries them into a scenario.
The list of sources is not saved. The GeoTIFF that you added, the offset that you set and the enabled state of the Mapbox source live in the browser tab. They stay for as long as the tab is open. After a reload, the project starts again from Mapbox default data alone. The app does not store the GeoTIFF files for you, so keep them somewhere you can find them again.
- Junctions and Tanks — the Elevation field itself, and what else sits beside it.
- The map and its layers — the rest of the Map tab.
- Projections — giving an X-Y grid project a real-world projection, which brings elevations back with it.
- Network review — where a missing elevation shows up.