
Custom attributes
A custom attribute is a field that you add to an asset type yourself. A material class, an asset reference, a survey date and a criticality score are examples. EPANET has no such field, so nothing in the hydraulics reads them. They give you somewhere to keep the data that your organization works from. That data then sits beside the model that uses it, and not in a separate spreadsheet.
You define them per asset type, for seven types: junctions, pipes, pumps, valves, reservoirs, tanks and customer points. Both demo networks come with some attributes already defined. Drumchapel gives its pipes a class, a type, an operational status and a pressure rating. It gives its tank a name, a cell count and a top water level. It gives its pump a count and a model.
Custom attributes are a paid feature, except on the demo networks. On the free plan, the menu entry opens Upgrade to use custom attributes instead of the dialog. The attribute rows in the panels also carry a lock. See Plans.
Defining them
Section titled “Defining them”Operational data > Custom attributes opens the Custom attributes dialog.
The list of asset types is down the left. Each type shows its number of attributes in brackets. When you click an asset type, its attributes fill the grid on the right. The grid has two columns:
- Label — the name of the field. You see this name in every panel, every data table column header and every export column.
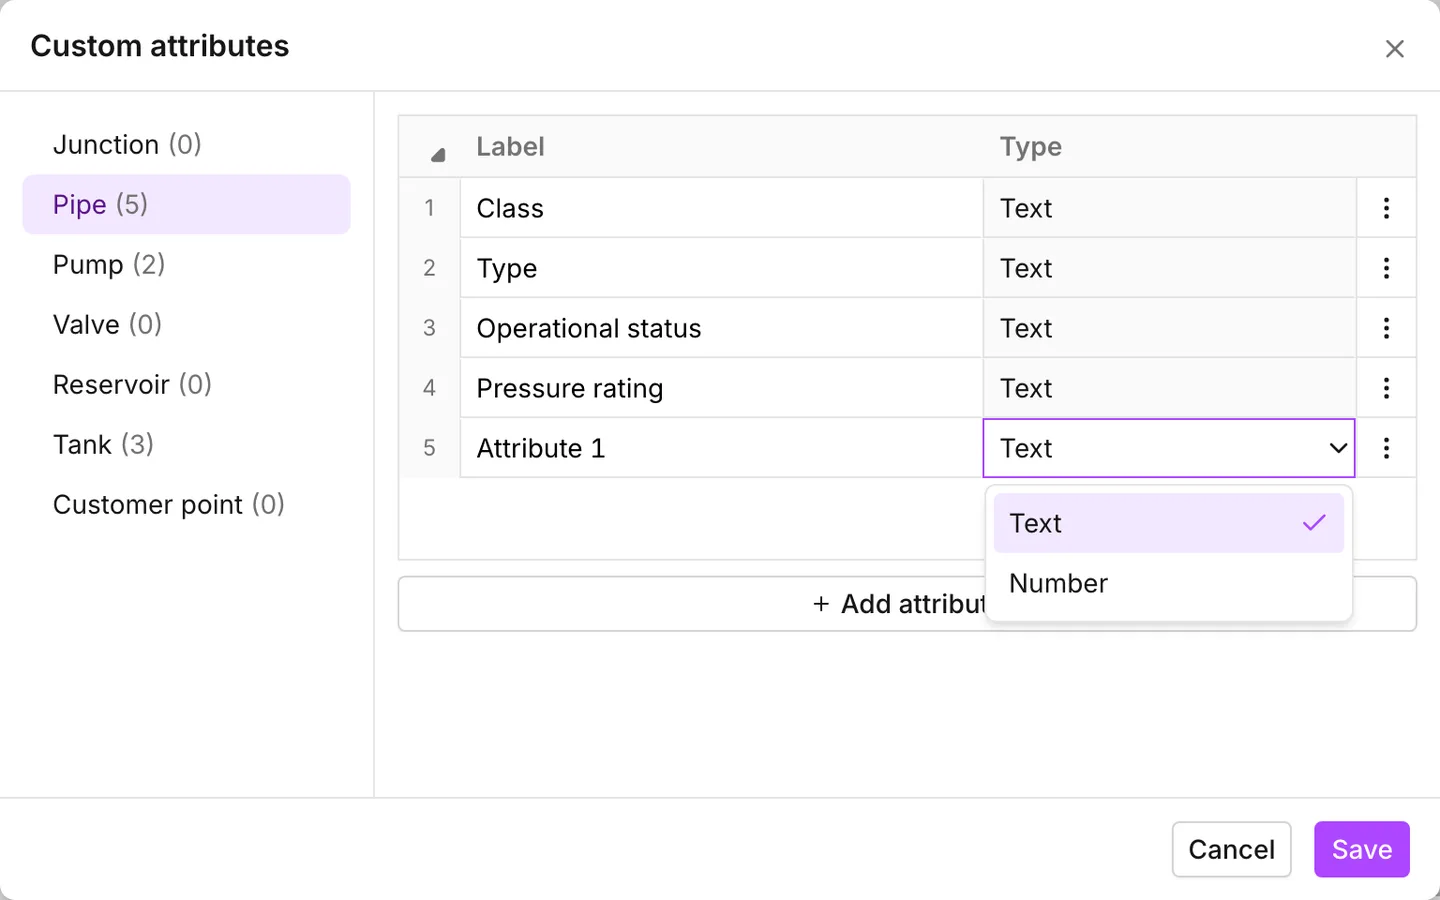
- Type — Text or Number. A number field takes numbers only, and formats them like any other number in the app. A text field takes anything.
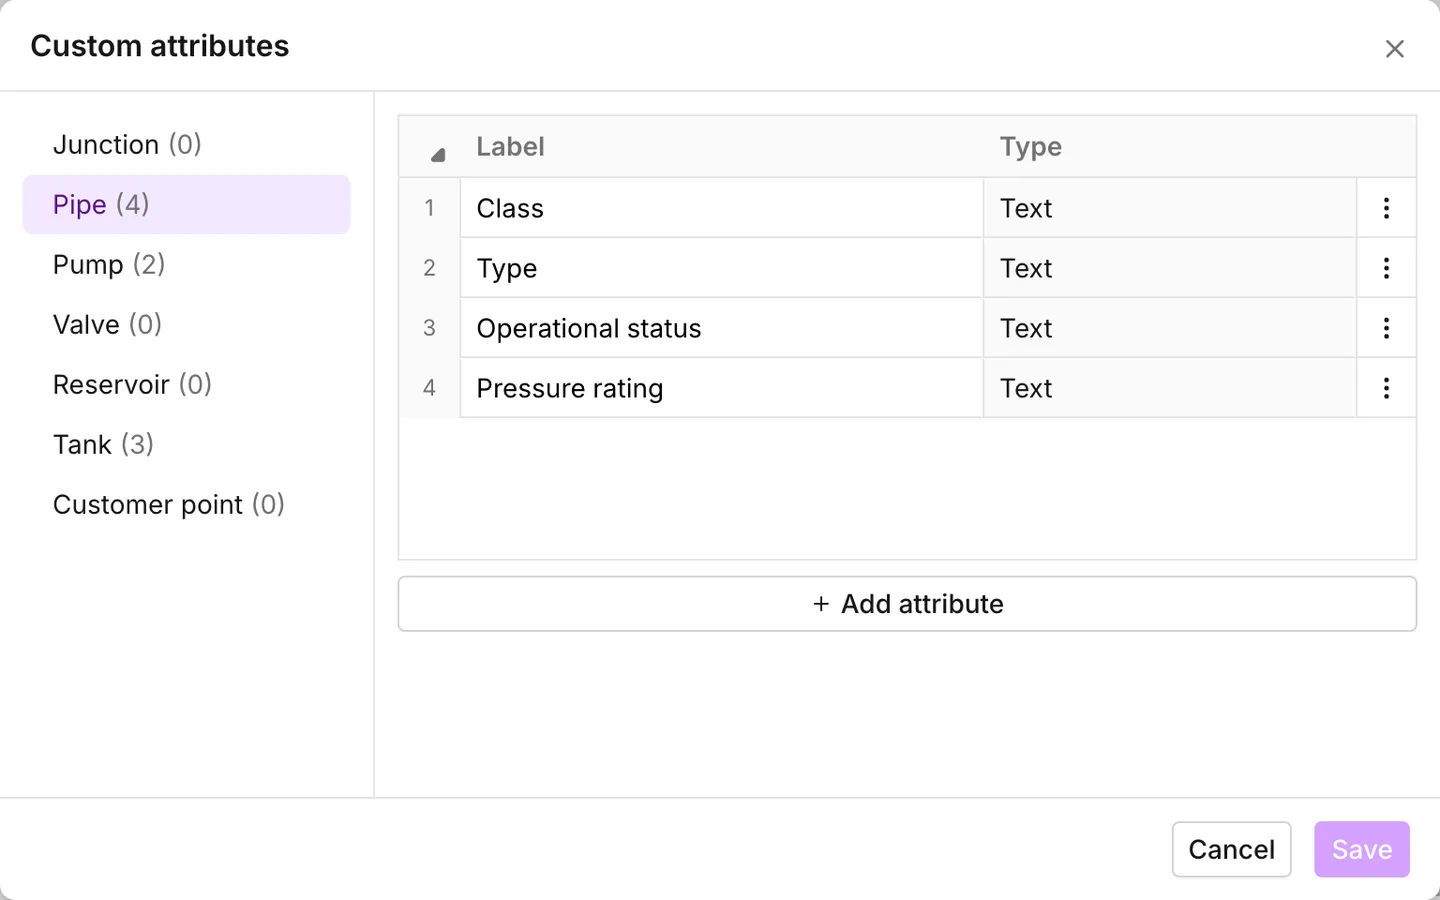
Add attribute adds a row at the bottom. The app names the row for you and gives it the type Text, and you change both. The menu on a row offers Delete. Save commits the whole definition, which is every asset type at once and not only the type you look at. Cancel discards it.
The rules the dialog enforces
Section titled “The rules the dialog enforces”A label must obey three rules:
- It cannot be empty.
- It cannot be longer than 64 characters.
- It must be unique inside its asset type.
Two asset types can use the same label. A field with that name on pipes and a field with that name on valves stay separate fields.
When a label breaks one of these rules, the dialog marks the cell. A banner reads Invalid attribute and names the rule that the label breaks. The asset type with the fault gets a warning triangle in the list on the left. Save stays disabled until you correct the label. The check runs across every asset type. A Save that does not respond usually means that the problem is on a type you do not look at, and the triangle shows which type.
Filling them in
Section titled “Filling them in”When an asset type has attributes, a Custom attributes section appears in the panels for that type. The section sits between Model attributes and the section that comes next. An asset type with no attributes gets no section.
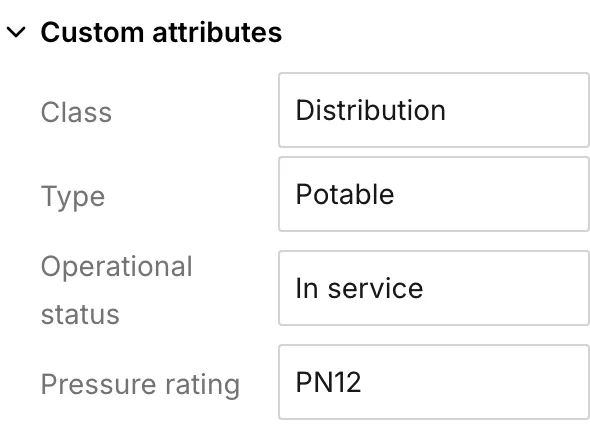
- One asset at a time. Select it and edit the rows in the Asset tab. See The Asset tab and the page for that asset type.
- A whole selection at once. When you select several assets of one type, the multi-asset panel shows the same rows and writes what you type into all of them. When the selection holds more than one value, the field shows how many different values there are. A button beside the field lists the values with counts. If you click a value, the selection narrows to the assets that have it.
- Customer points get their own Custom attributes section in the customer point panel and in the multi-asset panel, the same way. See Customer points.
- In bulk, as a grid. Every attribute becomes a column on the tab for its asset type in the data tables. The column carries the label of the attribute and comes after the model properties. This is the fastest way to fill a new field across a whole network, because the grid takes a pasted column.
Where they travel
Section titled “Where they travel”- An asset data export writes them as ordinary columns. Each column carries the label of the attribute, not an internal name. The export writes customer points as their own sheet or layer beside the assets. See Import and export.
- The model builder can create them. The attribute mapping step lists each layer under Layers. For a network layer or for customer points, Custom attributes takes as many further source properties as you need. The builder carries them into the built model as custom attributes. Each one takes the name of the source property, and the builder infers the type from the data. See Build a model from GIS.
- An epanet-js project file (
.ejsdb) keeps both the definition and every value. - An INP does not. The format has no room for them. The export dialog also
tells you that the format does not support all epanet-js features, such as
customer points, custom asset fields, selection sets, bookmarks and native
controls. Export an INP for the engine, and keep the
.ejsdbas the model. See Projects.
- The Asset tab — where you edit the values one at a time.
- Data tables — the same fields as columns.
- Build a model from GIS — how GIS properties come in as custom attributes.
- Import and export — how to get the values back out.