
Bring in an existing model
You have a hydraulic model. It was built somewhere else: in another package, by a consultant, or by the person who had the job before you. Now you want to work on it here.
This is the second of the three jobs people arrive with. Whatever the model was
built in, it reaches you as one of two files. The first is an EPANET .inp
from any tool that writes one. The second is an epanet-js project .ejsdb that
somebody made here.
If you have GIS layers and no model yet, go to Build a model from GIS. If the model is already open and you want to test changes against it, go to Scenario work.
Ways in
Section titled “Ways in”Each of these ways takes both file types, except where noted:
- Open model on the welcome dialog.
- File > Open, or Ctrl+O. One picker takes both
.ejsdband.inp. - File > New project > From EPANET INP, for INP only.
- Drag the file from your file manager onto the map.
- File > Recent, for a file you opened or saved here before. In Chromium, the submenu appears after there is something in it. Other browsers never show it. See Projects.
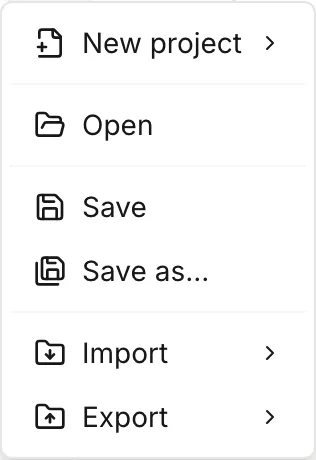
A model you open replaces the one you have open now. If the current project has unsaved changes, Unsaved changes opens first. It gives you Save and continue and Discard changes.
If you drag more than one INP in at once, Multiple INPs appears. The app uses the first file and ignores the rest. If the browser cannot read the file, Failed to read file appears. If the app cannot understand the file, Failed to open model appears.
An .ejsdb project opens directly
Section titled “An .ejsdb project opens directly”The project file is the app’s own format. It carries everything the model has, including the things an INP has no place for: customer points, custom attributes and native pump controls. So the import asks you nothing, and there is nothing to examine afterwards. The project opens with a progress dialog, and then you can work. The rest of this page is about INP files.
What an INP import asks you
Section titled “What an INP import asks you”The import runs in one pass. It stops at the first thing it cannot resolve. The dialogs come in this order:
Coordinates it cannot use
Section titled “Coordinates it cannot use”Invalid coordinates means that the file has coordinates that are not
numbers. Coordinates missing means that a node has no row in
[COORDINATES] at all. Both stop the import. The app loads nothing, and the
project you had open does not change.
Expand Unsupported features on either dialog to see the ids at fault. The dialog gives the first four ids, then a count of the rest. Fix those rows in a text editor. Then import the file again.
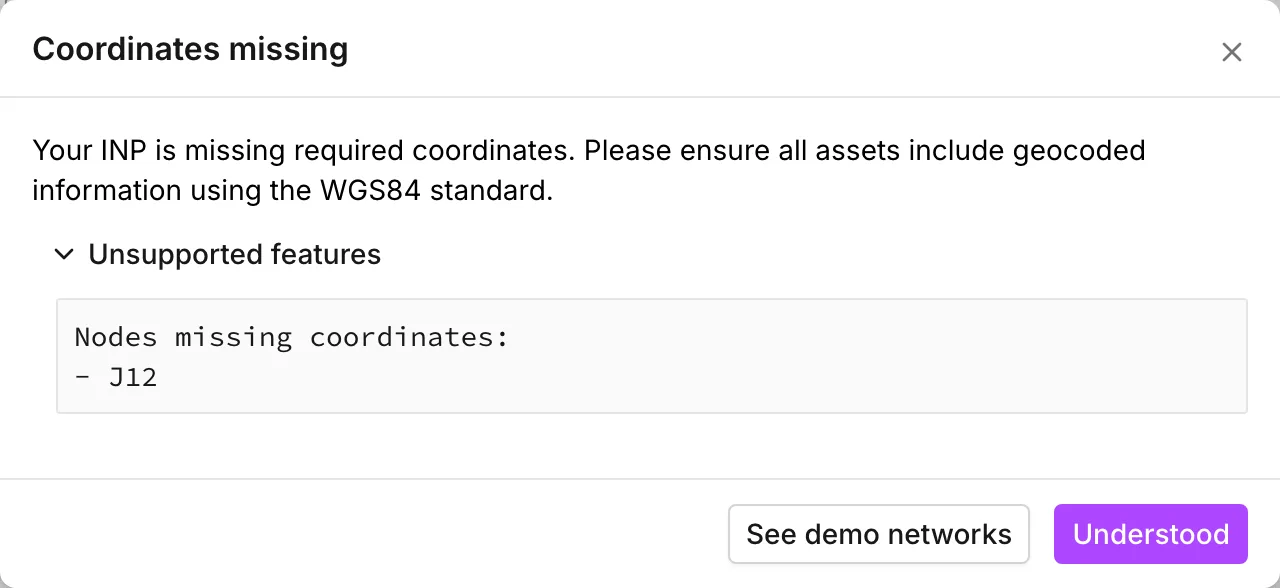
You cannot correct either case inside the app. There is no option that places the nodes for you, because a node with no position cannot be drawn or connected.
The projection
Section titled “The projection”epanet-js puts the network on a real map, and an INP does not say what
coordinate system its numbers are in. The Network projection dialog opens
before the model loads in two cases. The first case is coordinates that are not
longitude and latitude. The second case is coordinates that look like longitude
and latitude, but the lengths in [PIPES] disagree with the distances between
those coordinates by more than a factor of ten either way.
Find your projection takes a place name or an EPSG code. The two are
different routes to the same answer. The frames that follow show one file taken
each way. It is a distribution network in Kentucky whose [COORDINATES] run
into the millions, because they are US survey feet on the Kentucky Single Zone.
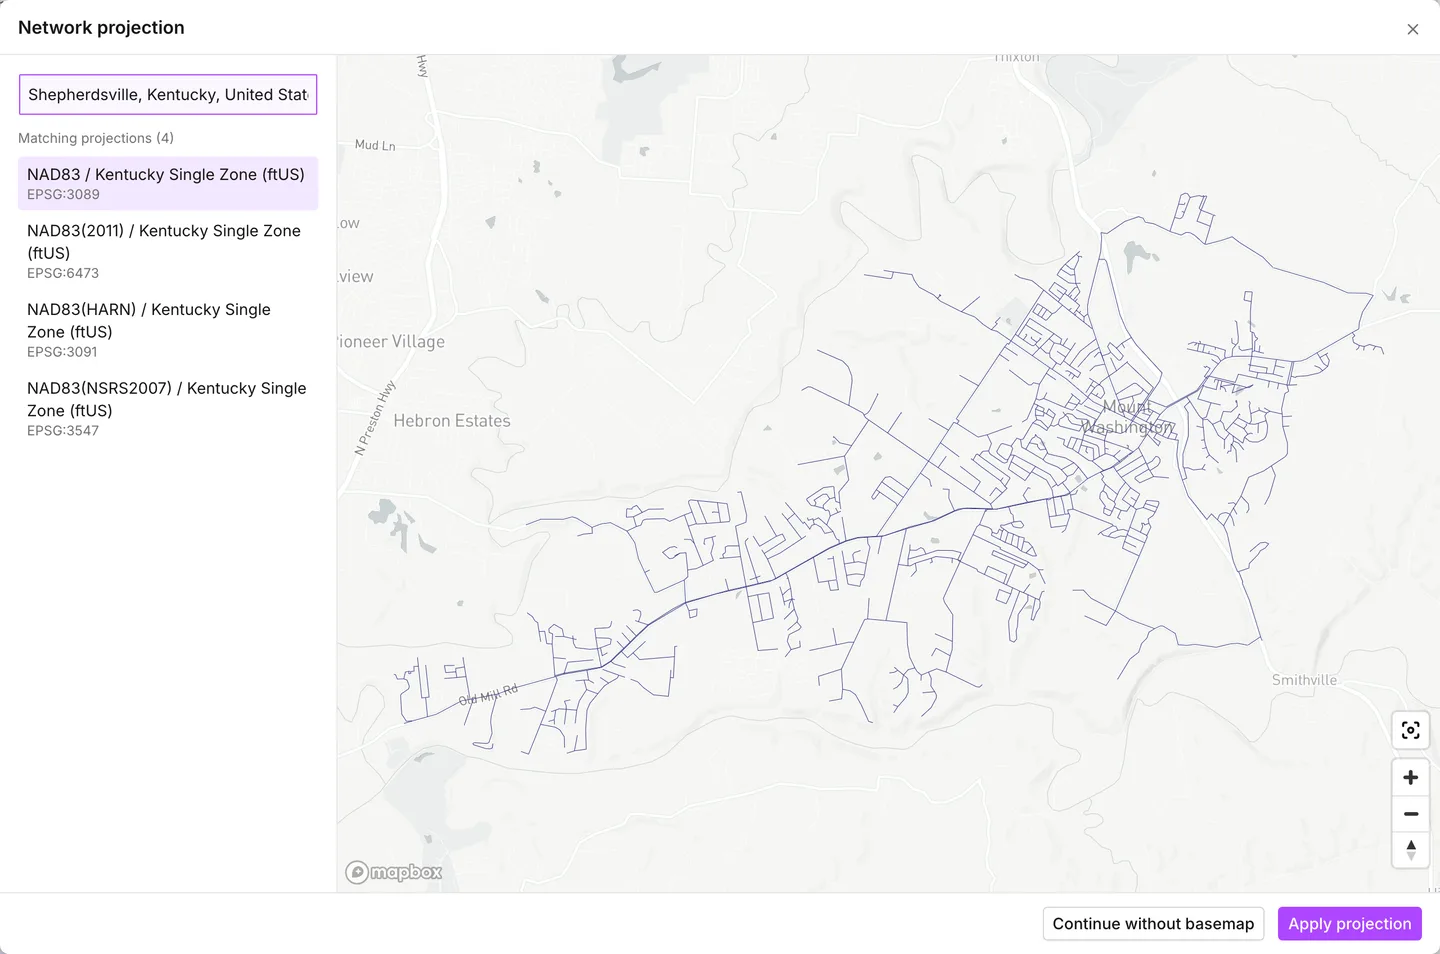
When you know roughly where the system is, but not what coordinate system it is
in, search by place. Type a nearby town into Search by location or code,
Shepherdsville, Kentucky here, and choose it from the results. The preview
flies to that town. Matching projections then fills with every coordinate
system that puts your network somewhere inside the view. There are four of them
here, all Kentucky Single Zone on different realizations of NAD83. The app
applies the first one for you.
The town you searched for only sets the view. The network draws where the system you are trying puts it, which here is a few miles east of that town. So what tells you the answer is right is mains that follow streets, not the name on the map.
When the file came with a system named on it, or somebody told you the code,
search by code. Type 3089 instead. A full code skips the place search. One
system comes back, and when you choose it, the app applies that system and fits
the preview to the network in one step. When the place search is not available,
this route still works, because it uses no geocoder.
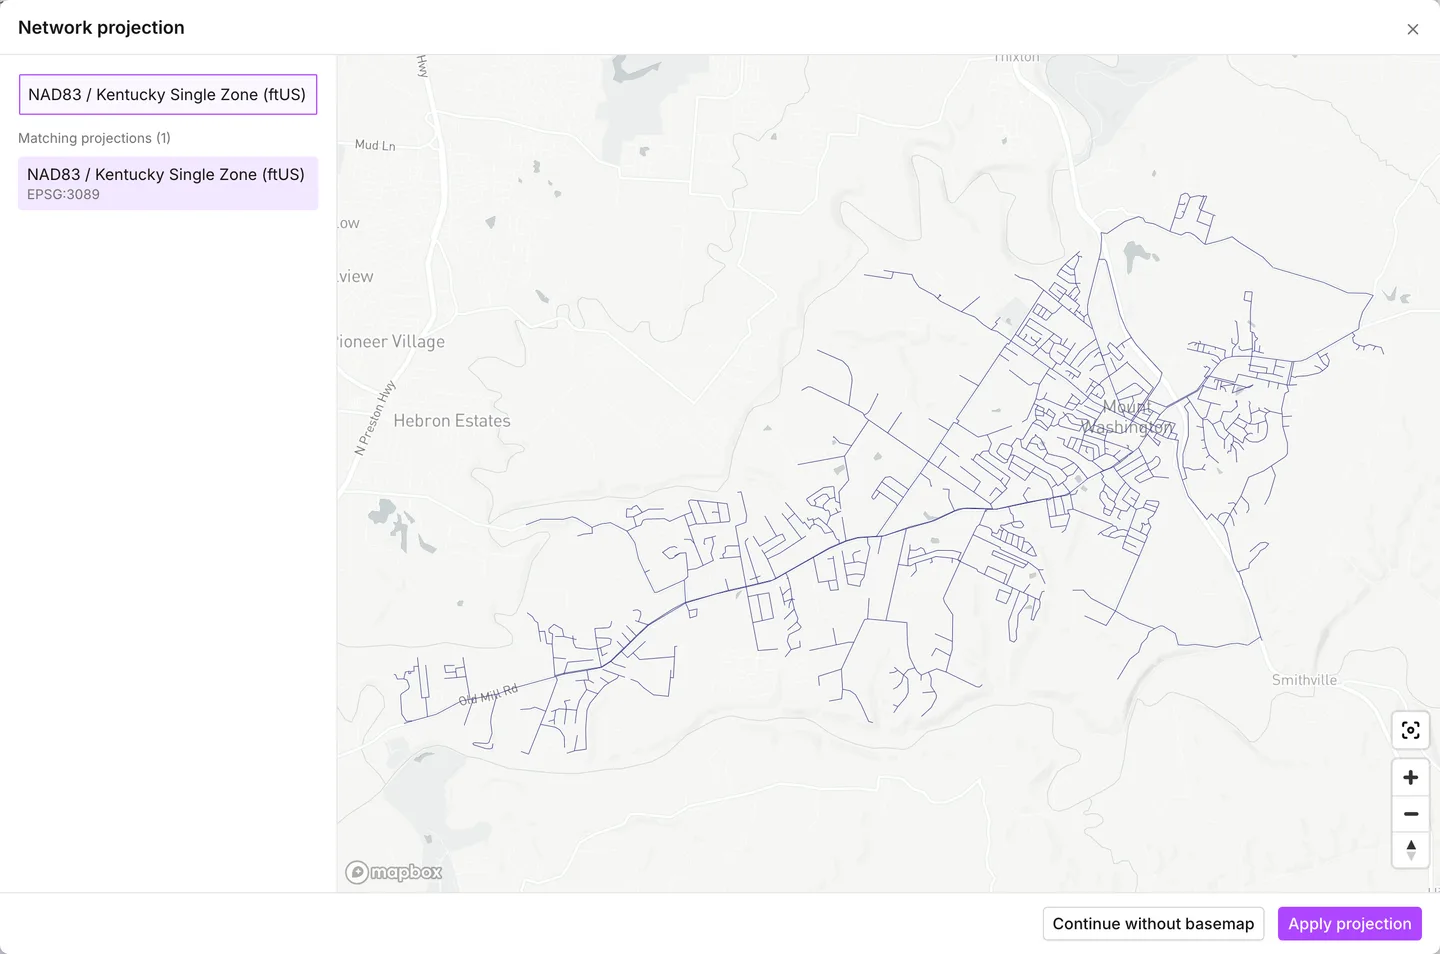
Either way, make sure that the preview lands where the network belongs, then press Apply projection. The app converts the coordinates to longitude and latitude. It stores the projection you chose with the project, so exports come back out in your own system.
Continue without basemap is the other answer. It brings the network in as an XY grid. This grid is a local coordinate system centered on the network itself, with no background map and no real-world position. When the model has no true location, such as a test network, a textbook example or a schematic, take this answer. In a grid project the app does not fetch elevations from the terrain service, because there is no terrain under the network. See Projections to change this later.
What does not import exactly
Section titled “What does not import exactly”A file that imports, but that the app does not fully support, ends on Partially supported features. When the dialog opens, the list is collapsed. Expand Unsupported features to read it.
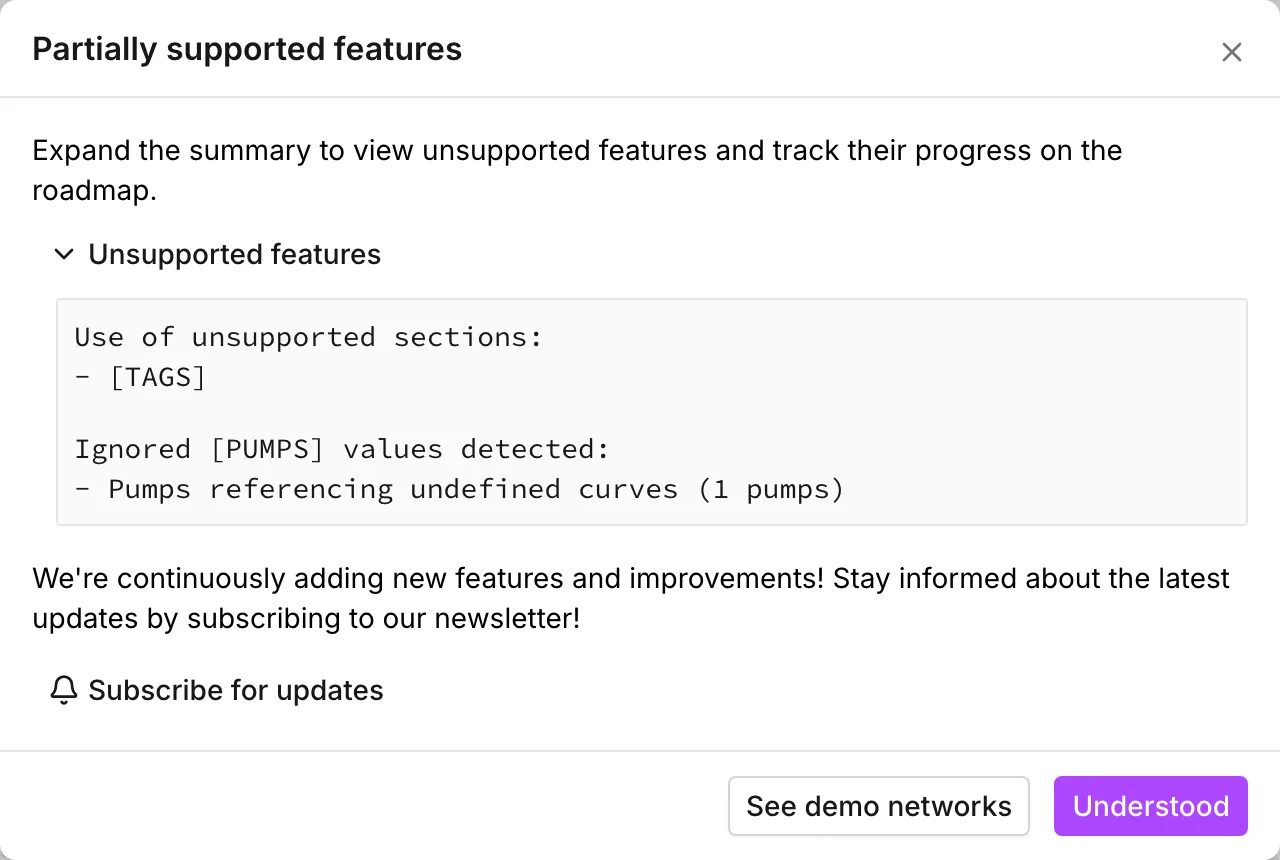
The entries come in a few kinds:
- Use of unsupported sections names section headers the app does not read,
with the header quoted as it appeared.
[LABELS],[TAGS]and[LEAKAGE]are named here, and so is anything the parser does not recognize at all. - Non-default epanet [TIMES] values detected names a timing the app has no setting for, together with the default value it used instead. A pattern start, a report start, a start clock time or a time statistic turns up here.
- Non-default epanet [OPTIONS] values detected does the same for an option, including a units keyword or a headloss keyword the parser cannot read.
- Ignored [PUMPS] values detected and Ignored [VALVES] values detected cover two cases. The first is a pump that names a curve the file never defines, and this pump gets a placeholder curve. The second is a valve whose type is not one of PRV, PSV, FCV, PBV, TCV, GPV or PCV, and the app imports this valve as a TCV.
Read the list before you dismiss it. Nothing here stops the model running, and most of it changes nothing you care about. But a pump with a placeholder curve changes results, and so does a valve that became a TCV. Both are easier to fix now than to find later. See Pumps and Valves.
The format notice
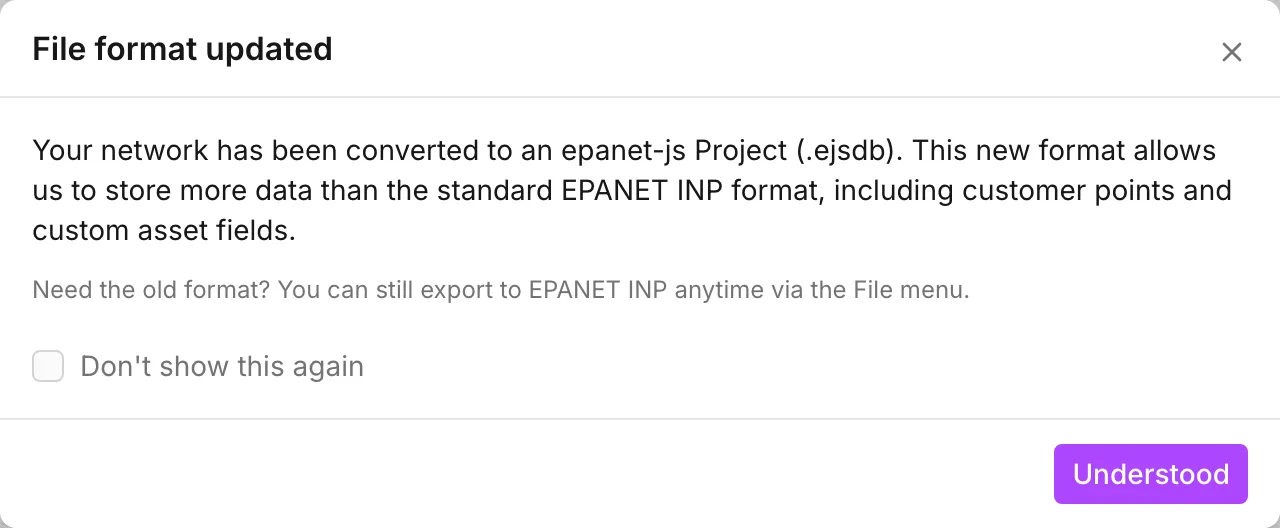
Section titled “The format notice”The last dialog is File format updated. It says that the network is now an epanet-js project. It appears on every INP import until you tick Don’t show this again.
What comes across
Section titled “What comes across”The app reads everything it models from the file:
- Junctions, reservoirs, tanks, pipes, pumps and valves, with their attributes
- Demands, including multiple demand categories per junction
- Patterns and curves
- Emitters
- Simple controls and rules
- Initial quality, sources, reactions and tank mixing
- Energy prices and efficiency curves
- The
[OPTIONS]and[TIMES]that become the project’s units, headloss formula and simulation settings
What does not come across is what the INP format has no place for. An INP has no customer points, no custom attributes, no native pump controls and no zones. A model that goes out to INP and back loses them. That is the reason the project file exists, and the reason to save as one as soon as the import is done.
What to do first
Section titled “What to do first”The import leaves you with an unsaved project, a network drawn on the map, and nothing colored. Work outwards from there:
- Save it. Save, or Ctrl+S, writes an
.ejsdbto a location that you choose. Until you save, the model exists only in the browser. See Projects. - Make sure that the units and the headloss formula are right. The status bar
along the bottom shows Flow, Pressure, Headloss and
Demand multiplier for the project. These values come from
[OPTIONS], so they are usually right. But they decide how the app shows every number to you. - Make sure that the timing is right. Open Simulation settings. Look at the duration and the timesteps. A duration of zero is a single-period run. See Simulation settings.
- Do the checks. Click the Network Review icon in the activity bar. The panel opens on the left of the map. It shows orphan assets and connectivity problems that a text-based tool never showed you. Three of the five checks can also block a run. See Network review.
- Run the model, and compare the results. Press Simulate. If you have results from the tool that the model came from, compare the two sets. Do this before you edit the model. See Running a simulation.
- Color the map. The app does not do this for you. Open the Map tab. Set Node symbology and Link symbology to the properties that you use for your review. See Symbology.
Export the model
Section titled “Export the model”File > Export > EPANET INP writes an INP for EPANET or for another
tool. The app warns you with Some data may be lost first. Press
Export to INP to continue, or Save as Project to write an .ejsdb
instead. The app writes the coordinates in the project’s projection.
To move results or attributes rather than the model itself, use Asset data and Simulation results in the same menu. See Import and export.
- The interface — where everything is in the window the model just landed in.
- Network review — the five checks, and which ones block a run.
- Projections — what the projection controls, and how to change it.
- Customer points — the demand detail an INP cannot carry.
- Scenario work — how to test changes against the model you just brought in.