
Scripts
A script is a short JavaScript program that runs inside epanet-js, against the model that you have open. It reads the network: its assets and their attributes, the zones, the selection, the collections and the results of the last run. It then hands back what it found. This output can be lines and tables in a console, files to download, assets selected on the map, and selection sets and bookmarks. A script reads the model. It does not edit it.
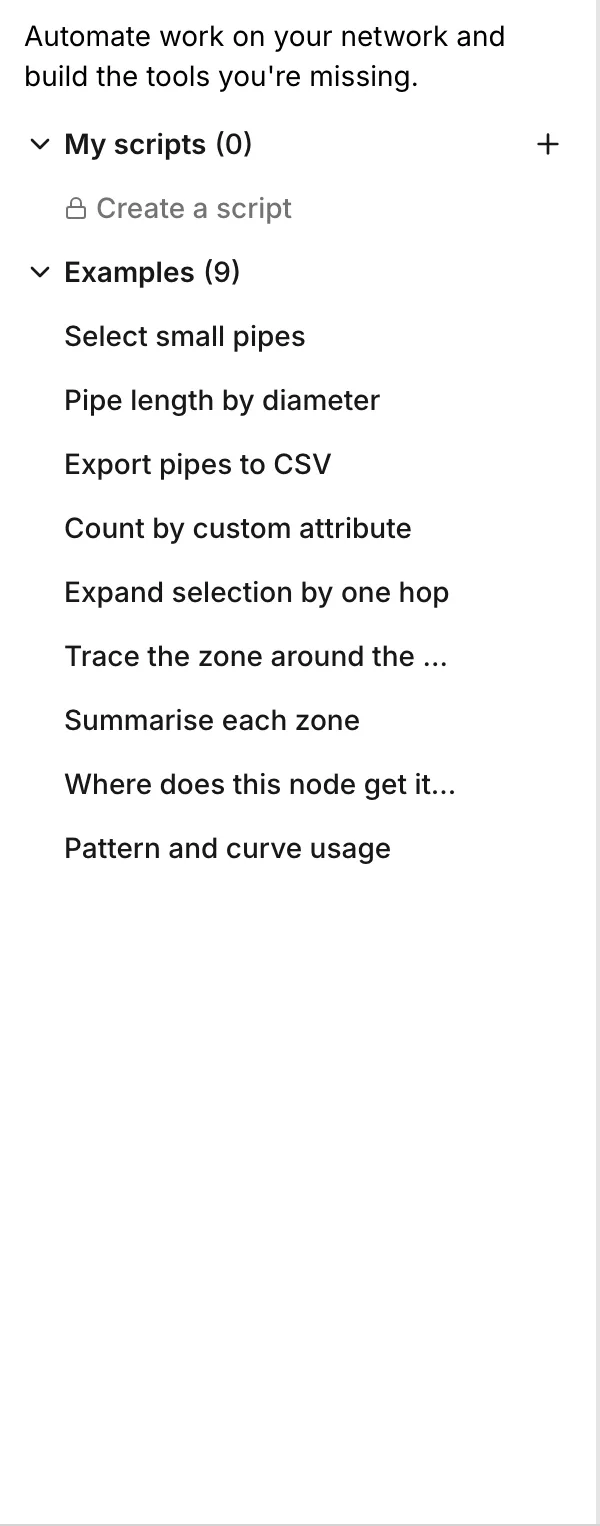
The Scripts panel holds the scripts of the project and the examples that come with the app. It is also where you write and run them.
Where scripting helps
Section titled “Where scripting helps”If the app has no button for your question, a script can give you the answer. If you must examine the network one asset at a time to get the answer, a script can do this work. The panel says that a script automates work on your network and builds the tools that you are missing.
The examples show the kinds of job that suit a script:
- Select small pipes selects every asset that meets a rule.
- Pipe length by diameter, Count by custom attribute and Pattern and curve usage summarize the model in tables.
- Export pipes to CSV writes a file for a spreadsheet or for other software.
- Trace the zone around the selection, Summarise each zone and Where does this node get its water? follow the connections of the network, through zones and along the paths from the sources.
Each example ends with something that you can act on: a table in the output, a file, or assets selected on the map.
A script can also read the results of the last run. Thus a table or a selection can come from the results as well as from the attributes of the model.
Opening the panel
Section titled “Opening the panel”The Scripts panel opens on the left of the map, in the same place as Network Review and Collections. Click its icon in the activity bar. This bar is the column of icons at the left edge of the window. Toggle left panel in the toolbar, or Ctrl+B, opens and closes the left panel. See The interface.
The panel has two sections:
- My scripts lists the scripts saved in this project. Its last row is Create a script. The + button in its header is New script.
- Examples lists the scripts that come with the app.
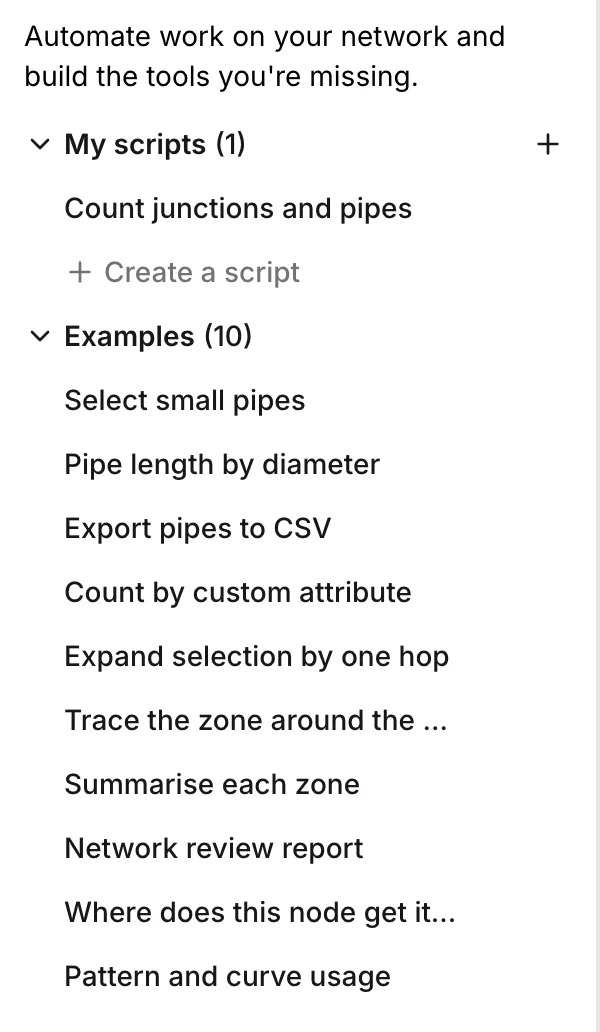
Click a script to open it in the editor. The play button at the right of a row runs the script and does not open it. More actions on the row has Edit. For your own scripts, the menu also has Rename and Delete.
On the narrowest windows, where every panel moves below the map, the Scripts panel is not available.
Writing a script
Section titled “Writing a script”New script opens the editor on a script named Untitled script. The cursor is in the name. Type a name.
The new script starts with a comment and one line of code. The comment gives the address of the API description for AI assistants. The line of code logs the number of junctions and pipes. As you type, the editor completes the names of the scripting API.
The header of the editor holds the back arrow, the name of the script, Scripting API, Save and Run. A saved script also has More actions. This menu has Delete. In the editor, Ctrl+S saves the script and Ctrl+Enter runs it. On macOS, the keys are ⌘S and ⌘Enter.
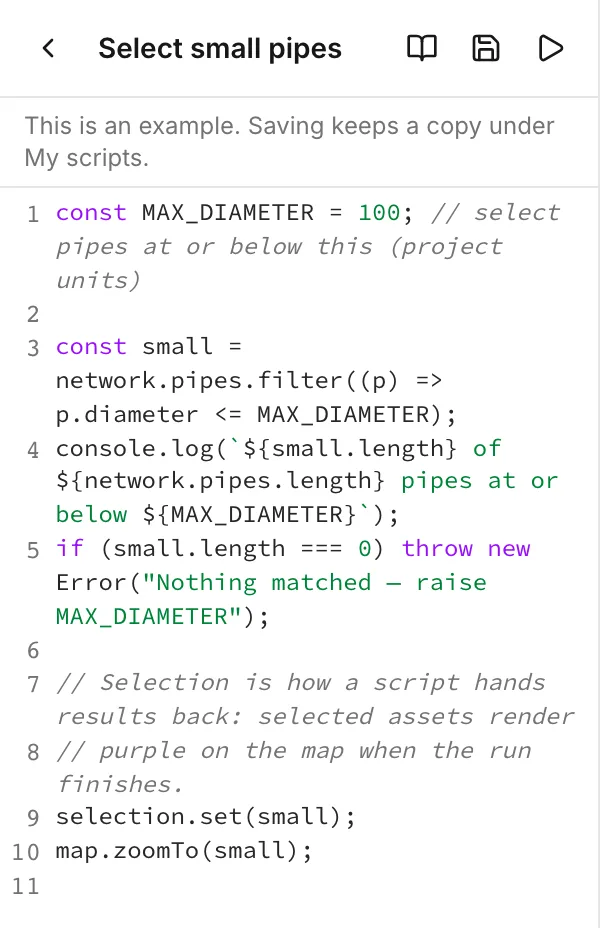
Save puts the script under My scripts. An example opens with the line This is an example. Saving keeps a copy under My scripts. The example stays as it was. If you did not rename the copy, its name is the name of the example followed by “(copy)”.
If the script has unsaved changes and you return to the list, the editor asks whether you want to discard them. Save changes saves the script and closes it. Discard changes closes the script and keeps it as it was. The back arrow does nothing until you choose.
A small example
Section titled “A small example”This is a four-line version of Select small pipes:
const small = network.pipes.filter((p) => p.diameter <= 100);console.log(`${small.length} of ${network.pipes.length} pipes at or below 100`);selection.set(small);map.zoomTo(small);The first line finds every pipe with a diameter of 100 or less, in the diameter unit of the project. The second line writes a count to the console. The last two lines hand the pipes back. When the script ends, the app selects them on the map and zooms to them. The example in the panel is the same script, but it sets the limit in one place at the top. If no pipe matches, it gives a clear error.
The scripting API
Section titled “The scripting API”What a script can read and hand back is the scripting API. The reference at app.epanetjs.com/scripting-api describes all of it, with examples. Scripting API in the editor opens it in a new tab. Help > Scripting API does the same.
To have an AI assistant write a script, give it llms.txt first. That file describes the whole API in a form that an assistant can read. If your assistant cannot open links, open the file yourself. Then paste its text into the assistant.
Running a script
Section titled “Running a script”Press Run in the editor, or the play button on the row of the script in the list. While the script runs, a dialog shows the name of the script, Running with the time since the start, and a progress bar. Cancel stops the script. Then the output reads Run cancelled. There is no time limit.
The run opens the bottom panel on the Script output tab. When the script ends, the dialog closes, and the app applies what the script handed back. The selection that the script set appears on the map, and the map zooms where the script asked.
If a script stops on an error, the output shows the error and the line of the script that it came from. In this case, the app applies nothing that the script handed back: no selection, zoom, files, selection sets or bookmarks. But the console lines that the script printed before the error stay.
Reading the output
Section titled “Reading the output”The Script output tab has two parts. The console on the left holds the lines and tables that the script printed. The console shows warnings and errors in color. It keeps the last 1,000 entries. If the script printed nothing, the console reads No console output.
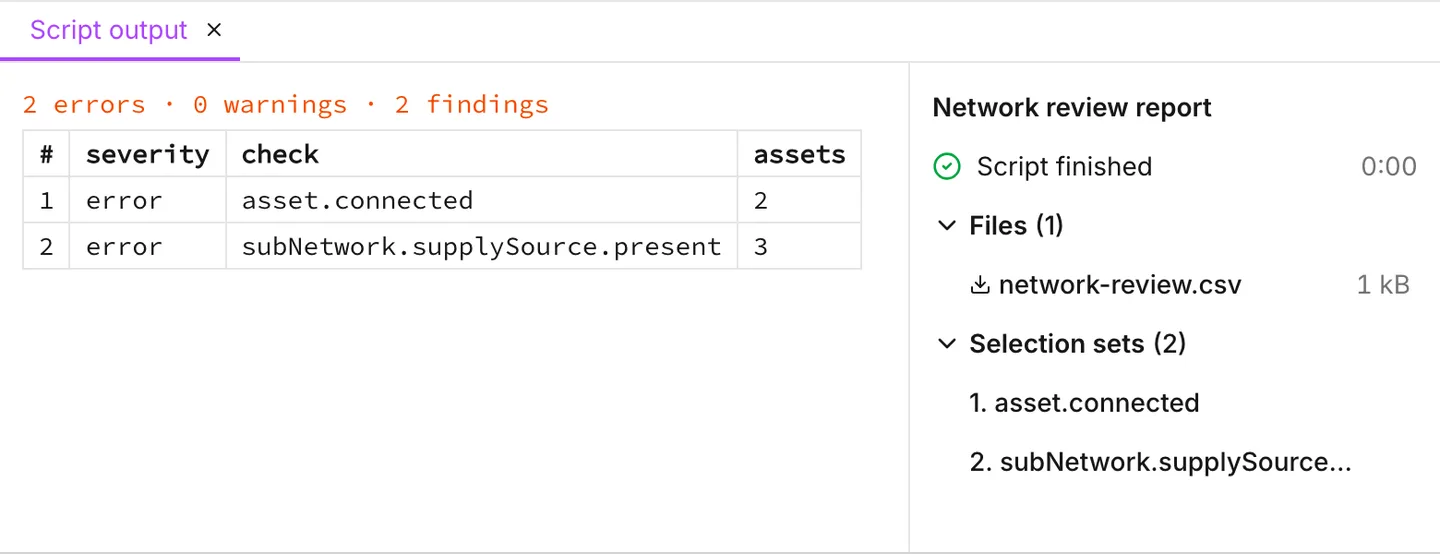
The column on the right gives the name of the script and how the run ended: Script finished, Run cancelled or the error. The time that the run took is beside it. Under that, a section lists each kind of thing that the script handed back:
- Files. Each file shows its size. When you click a file, the app downloads it. On the section header, More actions > Download all as zip downloads all the files as one zip file. The zip file takes its name from the script.
- Selection sets. When you click a set, the app selects its assets on the map and zooms to them.
- Bookmarks. When you click a bookmark, the map moves to its area.
The tab shows the output of the last run only. The next run replaces this output. When you close the tab, the output is gone.
Saving selection sets and bookmarks
Section titled “Saving selection sets and bookmarks”The selection sets and bookmarks of a run stay in the output until you save them. A run does not add them to Collections by itself. Thus you can run a script many times until the result is right. The project does not fill with sets from each run.
To keep a set or a bookmark, open More actions on its row. Save selection selects the assets of the set and opens the Collections panel with the name box ready. The box holds the name that the script gave the set. If you want a different name, type it first. Then press Enter to save the set. Add bookmark does the same for a bookmark.
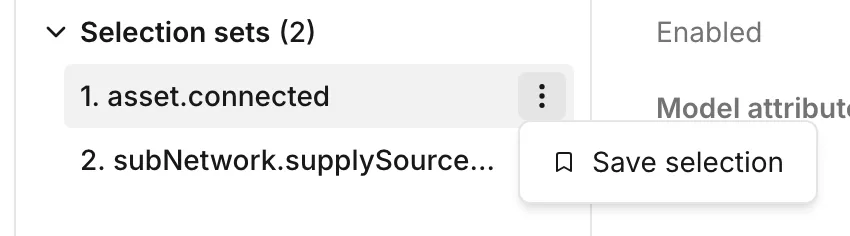
When a run hands back unsaved sets or bookmarks, Save all appears in More actions on the section header. It saves all of them to Collections at the same time, with the names that the script gave them. It also opens the Collections panel.
A script can also ask for a set or a bookmark to go straight into Collections. If you can save collections, the set or the bookmark is already saved at the end of the run. Its row has no save action.
Saved with the project
Section titled “Saved with the project”Scripts are part of the project, as collections are. When you save, rename or delete a script, the project has unsaved changes. Then Save in the toolbar writes these changes to the file. When you open the project again, its scripts are under My scripts. A new project starts with no scripts.
An EPANET INP file has no place for scripts. As a result, an INP export does not include them. See Projects.
Who can use scripts
Section titled “Who can use scripts”To write and run your own scripts, you must have a Pro, Ultimate, Personal or Education plan, or a free trial that is active. On the demo networks, Drumchapel and Waterdown, the whole panel is free to use. See Quick start.
On the free plan, on your own networks, the panel still opens, and so do the examples:
- The examples run, and their output appears as on any plan.
- The examples open read-only. If you try to change the text or the name, or press Save, Upgrade to use scripts opens.
- Network review report, the example that needs a plan, is not in the list.
- New script and Create a script (which shows a lock) open Upgrade to use scripts.
- If the project already holds scripts under My scripts, they open read-only. For these scripts, Run opens Upgrade to use scripts.
When you save the output to Collections, the rules of the Collections panel apply. On the free plan, Save selection and Add bookmark open the Collections panel first. When the panel is open, they open Upgrade your account. Save all opens Upgrade your account directly. See Collections and Plans and licensing.
- Collections — where the selection sets and bookmarks of a run go when you save them.
- Selecting and finding assets — the selection that a script starts from.
- Running a simulation — the run whose results a script reads.